READY TO ROW:

Haley and Parker finished their Sonlight lessons, so everyone joined in on our second to last FIAR row, The Little Red Lighthouse and the Great Gray Bridge: Restored Edition

As with our other rows, the kids drew a title page in their FIAR notebooks.

I ask them to always have it include something from the story and the Title as well as the Author. I love Haley’s details on the lighthouse, shading, and light illuminating from the glass room on top.
BIBLE:
Memory Verse:
I created a Bible verse printable pack to go along with this book. I chose “glorifying God” as the theme for this row.

You can purchase it here at our TPT Store. There’s a bonus FREEbie tracer in the Preview!

The kids traced their Bible verse worksheet the first day.

I cut apart their verse like a puzzle and they pasted them together in their FIAR notebook.
Pride & Humility:
We talked about the difference between pride in a work well done and being proud. We can feel a sense of pride when we do our best and bring glory to God, but the line is crossed when we start boasting and thinking more highly of ourselves than we ought to.

We watched a clip on our jellytelly app about Nebuchadnezzar. The kids LOVE this clip! I love reading/watching the story of Nebuchadnezzar when we talk about pride. He was given a taste of humble pie. His story ended well, but many do not. The Bible is full of great “lighthouse” examples so we don’t follow the same path of destruction.

In contrast, we watched a clip on our jellytelly app about Humility.
SOCIAL STUDIES:
New York:
We learned about New York while rowing Mrs. Katz and Tush, but this time we focused our attention on Manhattan Island.

I set out our United States Atlas book to New York and presented it on Learning Lane with our U.S. Montessori puzzle.


We started our unit by reading Let’s Visit New York.

We stopped at this page, because it showed a great illustration of the Great Gray Bridge or the George Washington Bridge as it’s called.

We also read A Walk in New York and I handed the kids a few New York printables.

The kids used our US Map placemat to located the capital of New York.

I found a great New York map (education.com) with gridlines so they could learn how to read coordinates.

I also printed them a New York Maze (education.com), because who doesn’t enjoy a fun game here and there!


We brought out our Travels%20with Charlie: Travelin’ the Northeast (A Search & Find Geography Book)

I also asked the kids to put hearts on all the paces they would like to visit in New York.


We read a few more books about New York on our Epic app.

We also read Larry%20Gets Lost in New York City
The Hudson River:
I checked out several books about the Hudson River, but most of them were TOO text heavy and rather boring. Then the River of Dreams: The Story of the Hudson River

This book was a great read. It’s more suited for older children, because it’s packed with information. The difference between this book and some of the others was that it read more like a picture book, with the narrative of a boy named after the Hudson, telling us the river’s story with beautifully illustrated pages.
I was able to read it aloud, cover to cover, over lunch and learned the entire history of the Hudson River. Haley, Jordan, and I LOVED it!
LANGUAGE ARTS:
Balanced Title:
We were learning about a balanced title. So I prepped a GRAMMARtivity for the kids to work on. I cut out a white foam bridge, red lighthouse, and black triangle (balance), as well as nine index cards, a black sharpie pen, and a long piece of string.

I had the kids write the title of the book on the index cards, one word per card.

I had them personalize their bridge and lighthouse, because we would use these later for our lesson on personification.

First, we laid out the string. Second, we placed the lighthouse on one end, the bridge at the other, and the black triangle in the center (bottom – this was was the center of our balance). Third, I asked them to place all the cards in order on the bottom of the string. We placed the conjunction “and” in the center on the top.

We slowly went through the title starting with the words to the left side of the center “and” conjunction. The first word was “the”, an article. They placed it on the top of the string and we looked on the right side and found a matching article “the”. I informed them that an article on the left and right of the conjunction balanced the title.
We continued to with “little”, an adjective on the left and “great”, and adjective on the right which continued to keep the title balanced. The same was true balancing the title with “red” (adjective on the left) and “gray” adjective on the right). Lastly, the title balanced at the end with “lighthouse” (noun on the left) and “bridge” (noun on the right).

You can SEE how balanced the title really is. This was a wonderful teaching activity from the teacher’s manual.
Reading:
Since Parker finished his Sonlight studies, we worked through his Theodore Tugboat series.


He picked a new book to read each day.
Reading Comprehension – Story Review:
I quickly put together a series of questions for the kids to answer to test their read-aloud comprehension.

The kids went through the worksheets and found some of the questions a bit tough. I revised the worksheet and used a more “color by answer” approach.

There weren’t as many questions, but it was a more kid-friendly approach to testing their reading comprehension. Parker worked on this version.

You can download your FREE copy here at our TPT Store!
Personification:
I had the kids bring out their little foam lighthouse and bridge they “personified” for our balanced title activity.
They used their lighthouse and/or bridge as the subject for their creative writing assignment.

They used a computer to type out their creative writing assignment. The only guidelines was that they needed to “personify” (give human attributes to non-human things) either their lighthouse, bridge, or both.
Compound Words:
I printed a set of compound words (The First Grade Parade) and taped them all around the room. I printed one copy of a compound word worksheet (Sara J. Creations) for each kid.

They attached their worksheet to a clipboard and went around the room reading the words and matching the compound words.

They did a great job matching the words and making compound words.

When they were all done, I matched up the compound words they made. There were a few that were missed, but they hunted and found the stragglers. Great job kiddos!
MATH:
Counting:
I created The Little Red Lighthouse Math Pack for the kids to work on. There’s 13 B&W worksheets for Kindergarten through 5th grade. This is ideal for multi-age homeschoolers.

You can purchase your copy here at our TPT store. There’s an two-page Addition FREEbie in the Preview!


The kids each worked at their own level and did a great job!
Size:
We talked about how size is relative. What does that mean? It all depends on what you’re comparing that item to. I drew some sea creatures since we’ve been learning about the abyssal zone.

I drew a angler fish, a glass squid, and giant tube worms. I sketched a picture with all three to show that the giant tube worms were the biggest out of those three.

We got out our yardstick to see just how big they were. Then we talked about the size of a blue whale which can be approximately 80-100 feet. I then sketched a picture of the blue whale next to the three other creatures and they appeared as mere specks.

Finally, I drew a picture of the Marianna Trench and sketched all four sea creatures at the very bottom. They looked like bits of dust and the only one you could some-what see is the blue whale.
In conclusion, the giant tube worms are large when compared with the angler fish, small when compared with the blue whale, and tiny when compared with the Marianna Trench.
SCIENCE:
Lighthouses:
We started our unit on lighthouses with a special reading from our Indescribable:%20100 Devotions for Kids About God and Science

This devotional was a great lesson on how we need the LIGHT of God’s word to clear away the fog of this world.


After breakfast, we read About Lighthouses on our Epic app. We also read Hello%20Lighthouse

We read Beacons%20of Light

You can download it for FREE here at our TPT Store.

I described each part of the lighthouse and they had to guess the correct label.

They were able to guess many of the parts, but others required a definition.

This worksheet was labeled using a online diagram of the actual Little Red Lighthouse.

The kids spent most of the time outside. I brought them a snack and a read aloud.

I read aloud The%20Bravest Woman in America (Junior Library Guild Selection)

Earlier, I had the kids draw the windows on their paper roll lighthouses. I cut them out and brought out trays, paints, and brushes.

They chose the colors they wanted, painted them, and set them aside to dry.

This was a fun activity to do outside. Sunny, breezy, and we could just imagine a beach!

A week later we put painters tape around the tower and they pick and painted their stripe colors. Haley chose a dark gray shade.

Jordan went for the traditional bright red.

Parker chose yellow and bright blue.


Their lighthouses turned out really cute and we enjoyed all the lighthouse stories we read along the way.
BRIDGES:

We read Bridges on our Epic app and went to the carpet to test our knowledge of good engineering.

We started with just four paper rolls and placed a piece of paper on top. Jordan began adding pennies, one at a time.

The bridge collapsed before he could add the 5th penny. This was a flimsy design. MAJOR bridge fail!

Next we added two more paper rolls (columns) in the center. This design was better, but we couldn’t add too many pennies. Another bridge fail!

Our final design added a center column to the left and right of the two middle columns. We were able to add ALL the pennies in our jar. Then we tested it with our big dictionary and it took the test. Hmmmm…..what else could we add?

We added the little brother and could you believe those paper rolls were holding him up. Our design was AWESOME! The more columns, the more support….the more support, the better the bridge. Great job guys!

We also read Cross%20a Bridge by Ryan Ann Hunter (1998-03-05)

The older kids read The%20Great Bridge-Building Contest

We all read and loved This%20Bridge Will Not Be Gray: Revised edition with updated back matter

We also read Here to There and Me to You on our Epic app.

The kids felt inspired to play London Bridges Falling Down and they all took turns “lockin’ eachother up”.


Haley started working on a double-decker bridge project.

She had to split the bridge into sections over a few days and set them aside to dry.

Once dry, she brought out the glue gun and connected the sections of her bottom and top layers of the bridge.

Lastly, we worked together to assemble the sides and top of her bridge. It looked amazing! Great job Haley!

Jordan chose to make a suspension bridge and started in that direction, but he switched gears after seeing his sister’s bridge. I’m not one to waste parts, so we used what we could and constructed a similar double-decker bridge.

I used the parts I could to help him get to the point where he could assemble it himself.

Jordan and I hot-glued the pieces together. They were a bit warped from the white glue, but we made it work.

Boats:
We started our unit on boats with My%20Blue Boat

I read the story aloud while they kids ate their blue boat pancake, bacon, and fruit! I created an All About Boats worksheet for the kids to work on.

You can download it for FREE here at our TPT Store!


The kids colored their worksheets after breakfast.


We also read Boat%20Book

This book seemed geared to a younger audience, but it was perfect for showing us colorful images of different types of boats.

We also read Busy%20Boats (Amazing Machines)

There was a little red lighthouse in the book too!


Parker read more from the Theodore Tugboat series as well as The%20Little Sailboat


We went on a picnic and read a bunch of boat books out on the green belt.

We also read Tugboats%20(Mighty Machines) by Matt Doeden (2007-01-01)

Lastly, we ended with Tugboat%20Bill and the River Rescue
Land, Air, & Sea:
I set out several Land,Air, & Sea activities on Learning Lane.

Haley chose to work on sorting the land, air, & water picture cards (The Helpful Garden).

Jordan worked on sorting the Days of Creation Sky and Water vehicles (In My World).

I set up a land, air, & water tray for Parker. We used the land, air, & water category cards (The Helpful Garden) with brown (land), blue (air), and turquoise (water) bowls.

I set out our jars soil (land), empty (air), and blue-tinted water (sea). We reviewed the three categories together.

Lastly, I filled a tub with land, air, and sea vehicles for him to sort through. He went through the tub and sorted the vehicles in their appropriate bowls.
Impaired Sight:
We talked about how lighthouses help warn boats with their lights. Storms and weather can impair their sight. The sound of the foghorn and the beacon shining bright help warn sailors so they don’t crash.
Blindness:
We took the lead from the manual and took a moment to discuss impaired vision caused by blindness.

We watched a few clips about blindness and Braille on our The Little Red Lighthouse playlist.


The kids each took turns being blindfolded, spun around, and instructed to walk to the kitchen. They found it difficult when their vision is “impaired”.

I found a Braille alphabet printable along with blank Braille pages (twinkl.co.uk) and instructed the kids to make their own secret message that Daddy and I would decode.

They used the blank worksheets to create their secret messages. As a kid, I was ALWAYS fascinated by both Braille and sign language.

I set out secret messages of my own and this time they had to decode them.

I made them all different, so they were excited to read their own personal message.

Bub and Daddy decoded his message together over breakfast.
Fog:
Next, we talked about weather conditions like fog that impair sailors sight on the water.


We read Foggy and Weather Watch Fog on our Epic app.

We headed to the kitchen to create fog in a jar. I used a mason jar, lit a match, dropped it in the jar, and set a ziplock bag, full of ice, on top.

It’s hard to see, but you really could see a swirly, misty fog in the jar.
You can really see the swirly fog in this video clip. This was a fun and SUPER easy science experiment!
River:
Even though we studied the Hudson River earlier, I wanted to go from fresh water to salt water before we started our annual journey into the ocean zones.

We read Learning About the Earth Rivers on our Epic app. I really love this book series, because it gives just the right information when reading to a mixed age group (1st and 3rd grader).

We also read The Brook Book by Jim Arnosky. We really love his books!

I brought out our River Definition Cards (Montessori Print Shop), made a quickie worksheet, and had the kids color code the parts of the river.

I read each card aloud and they colored it to match. We like to take this approach with many of our “parts of the…” lapbook inserts.

This was a great way to review all the parts of a river after reading all about them.

We also read Rivers%20(Natural Wonders)

I also printed a copy of a Water Sources lapbook insert (Mrs. Jones’ Creation Station) for the kids to color and add to their FIAR notebooks.
Salt Water vs. Fresh Water:
We read about Estuaries since we were coming from the fresh water to the salt water.

I read Seasons of the Estuary Biome on our Epic app with the older kids.
Experimenting with Water Density:

We headed to the kitchen for a lesson on the density of water. We started out simple by filled up two glasses with clear water.

I added salt to one glass, representing the salt water. I asked the kids to sketch the two glasses in their notebooks.

Next, we added food coloring and watched what happened in fresh water vs. salt water. This was fun to watch. I asked the kids to sketch and color what happened in their notebooks. You can see that the food coloring incorporated into the fresh water, but just hangs near the top on the salt water.

Next, we tested our water density with an egg. I did this exact experiment a few years ago, but the kids were much younger. They saw how the egg sank in the fresh water and floated in the water.
I explained that the density of the egg was greater than the fresh water which caused it to sink, but the density of the salt water was greater than the egg which made it float. I then asked them to sketch this in their notebooks too.

Next, we dove into density a little more. We read estuaries are places where fresh and salt water meet. We also read that the water has layers, the top layer is fresh (less density causes it to rise to the top) and the bottom layer is salty (greater density causes it to sink to the bottom).

We tinted our fresh water deep green and slowly added it to the salt water with a dropper syringe. This was amazing to see, because the fresh water collected at the top and the salty water sank to the bottom.

The kids sketched everything in their notebooks. This was a really fun way to “see” what you read come to life!
Sink vs. Float Experiment:
I printed a sink or float worksheet (Innovate Educate) for the kids to record their data, predications, and actual data.

Since Parker wasn’t with us for our first water density experiments, I decided to do a quick demonstration with a soap bar. First we talked about what makes things float (air, shape, etc.) then we dropped the soap in the fresh water and it sunk to the bottom.

Then I took it out and placed it in the salt water and you could see it rise to the surface. I gave a quick explanation about the density of salt water.

Everyone chose their own items to test in the fresh and salt water bowls. They record the item and their predictions.


They tested all their items in the fresh and salt water bowls.

They recorded the actual results and marked all the items they predicted correctly.
Ocean Zones:
Every year we end our studies in the ocean by diving in deep, all the way down to the deepest trench. Some years we start on the beach and work our way down, but this year we started at rock bottom, the trench zone.

We usually create our Ocean Zone Project using the Ocean Zones CRAFTivity printable at our TPT store.
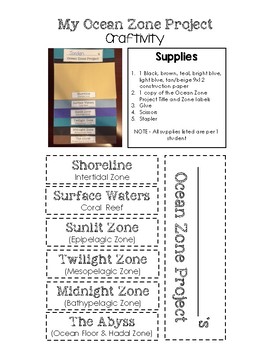
You can purchase your copy here at our TPT Store. We barely scratched the bottom layers last year so we just continued where we left off (the bottom) using last years charts.
The Trench:

We brought out our trusty 3-D Explorer: Oceans

We read all about the creatures we would fine on the bottom of the ocean floor.

We started reading The%20Magic School Bus on the Ocean Floor

I found this cool ocean zone printable (thekavanaughreport) and we used it as we moved through each zone. We left out empty plastic bottles and filled each bottle as we learned about that zone.

Since we started at the bottom of the ocean, we tinted the first bottle of water black to represent the trench.

We secured the top and set it out on our ocean zone tray.

I gave everyone a copy of the beautiful Oceanic Zones coloring page from Natural Beach Living. I instructed them to color just the trench, because we’re going to color each zone as we learn about it.
Vertebrates & Invertebrates:
We read that very few creatures live in the trench and the only type of creatures living in this zone are invertebrates. I brought out our Classes of Vertebrate Cards (The Helpful Gardener).

We reviewed the different classes of vertebrates together.

I divided the cards between the boys and instructed them to sort them by class.

Jordan worked through his cards without any help.

Parker needed some assistance, so big sister to the rescue! Haley helped him sort through his stack of cards.
The Ocean Floor:
I printed the kids a copy of The Ocean Floor worksheet (Layers of Learning).

They colored their maps and we added them to their FIAR notebooks.

God’s creation is amazing. Parker was so surprised to hear that there are mountains below the surface of the water and islands are tall mountains from the ocean floor.
Trench Trifle:
We wrapped up our trench zone with a tasty trench trifle. I whipped up a batch of cake box brownies over the weekend to satisfy my cravings. I controlled the fat content using a small amount of roasted pecans instead of the 1/2 bag of chocolate chips the recipe called for.

They were slightly dry, but they tasted delicious with a cup of hot coffee! I whipped up a box of sugar free chocolate pudding and grabbed a few Tropical Swedish Fish and candy-coated chocolates.

I layered our glass jars with a slice of brownie, pudding, brownie, pudding, and placed our candies on top. They were eerie and white, just like the ghostly creatures they represented.


The kids were SUPER excited to see the trench trifle and had no problem gobbling these creatures from the deep!
The Abyss:
We took an imaginary submarine ride up a level to the abyssal zone.

We started with a devotion about the deepest parts of the ocean and how God knows the deepest parts of us (Psalm 139). We just read about this while rowing The Story of Ferdinand. I love this Psalm.

We read Exploring%20the Deep, Dark Sea

We also read the abyssal pages in our 3D Explorer Oceans book.

The kids colored the abyssal zone on their Oceanic Zones worksheet.

I also found an ocean zone lapbook insert (Layers of Learning) for the kids to color and add to their FIAR notebooks at the end of our ocean journey.


After coloring the abyss on their worksheets, the kids sketched some creatures to add to their ocean zone project.

Parker added his drawings as well as the creatures I sketched for a “size is relative” lesson.

Haley added a few more creatures to her chart. I LOVED her glass squid!

Though not one of his favorite things to do, Jordan sketched a few creatures and added them as well. That wraps up our row, but we’ll continue our ocean journey while rowing All Those Secrets of the World!
HELPFUL LINKS:
The Little Red Lighthouse… Playlist:
As with our other rows, we created The Little Red Lighthouse playlist with read-alouds, music, science, and other clips.
Pinterest Board:
You can find most of the activities, ideas, and printables from this post on our The Little Red Lighthouse and the Great Gray Bridge Pinterest Board.
I happened upon your blog while planning our upcoming school year, and I am so glad I did! This blog is a fabulous resource for planning Five In A Row. Do you row one book per week?
Hi Courtney! Thanks for stopping by. I’m always happy to hear that our website helps other homeschoolers. The Lambert family chose really lovely books for their FIAR curriculum. We typically rowed most books about 2-3 weeks; however, some books lasted much longer. As we reached the highest level of picture books, our rows lasted about 4 weeks, on average. I knew we really wouldn’t repeat a row, so we covered all subjects and took our time “gleaning the fields”, so to speak. This approach really worked for our family. As long as the kids were still learning and enjoying the material, we kept on rowing. They look back at our FIAR rows with the fondest memories. ❤️